This article will describe building and deploying a .Net Core sample application for Docker. We’ll be using Docker Desktop for Windows and Visual Studio 2022 Developer Edition.
To learn how to install Docker Desktop on Windows 10 please refer to my article https://sultanealam.com/2023/02/22/configuring-docker-on-windows-10/
Deploying on Linux Container
Let’s follow the steps to create the project:
- Open Visual Studio 2022 and create a new project
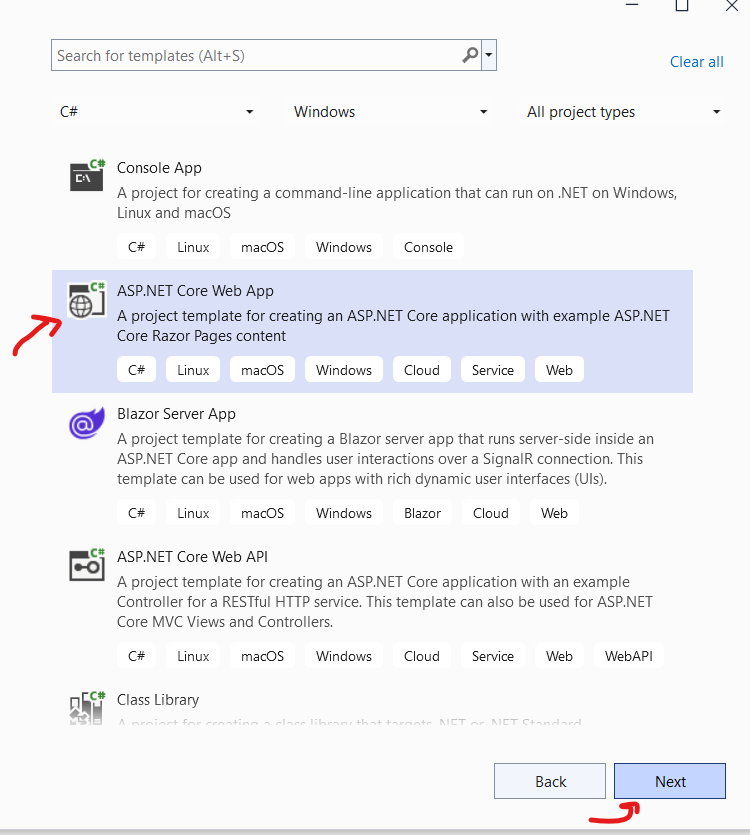
- Let’s name it CoreWebApp4Docker

- Enable Docker on the next screen and select Linux as container type

- Now make some changes at the index.cshtml file to display some customize text after we’ve deployed. Change at Line No 9 to
Learn about building Web apps with ASP.NET Core and deploying at Docker. - Let’s have a look at the Docker file which is created automatically by Visual Studio.Net
- The Docker file contains build instruction to deploy the image at Docker. This is known as Docker Multistage build feature. The multistage build allows container images to be created in stages that produce intermediate images.
- At the top the Docker Multistage build file following section is telling Docker to create ASP.Net image from Microsoft Container Registry. It’s creating an intermediate image named base that exposes Port 80 and set working directory to /app
FROM mcr.microsoft.com/dotnet/aspnet:6.0 AS base
WORKDIR /app
EXPOSE 80- The next stage is Build which starts with a different original image from registry which is sdk. The sdk image has the build tools and it’s quite bigger than the aspnet image. The aspnet image only contains the runtime.
FROM mcr.microsoft.com/dotnet/sdk:6.0 AS build
WORKDIR /src
COPY ["CoreWebApp4Docker.csproj", "."]
RUN dotnet restore "./CoreWebApp4Docker.csproj"
COPY . .
WORKDIR "/src/."
RUN dotnet build "CoreWebApp4Docker.csproj" -c Release -o /app/build
- The next step is publishing the image from
build
FROM build AS publish
RUN dotnet publish "CoreWebApp4Docker.csproj" -c Release -o /app/publish /p:UseAppHost=false
- The final stage is using the
basewhich have only the runtime and copy the recently published folder to the final image. As the final image is only containing the runtime so it’ll be quite smaller that thebuildimage.
FROM base AS final
WORKDIR /app
COPY --from=publish /app/publish .
ENTRYPOINT ["dotnet", "CoreWebApp4Docker.dll"]
- So we are done with the Dockerfile. Visual Studio 2022 have built in feature to build the application as Docker image.

- However we won’t do this. We’ll use WSL command line to build the application.
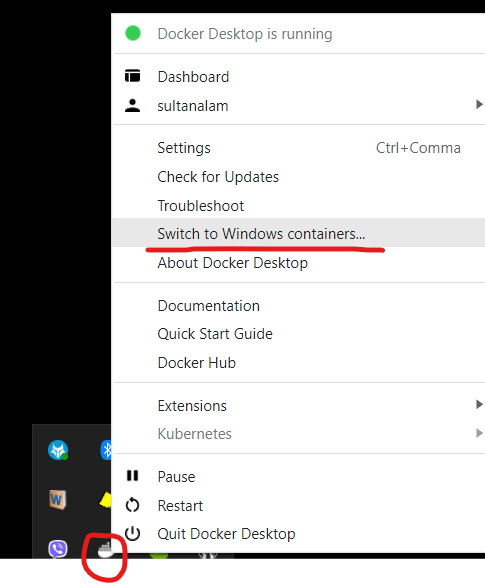
- At first run your Docker Desktop and ensure that you are running Linux Container. If you find the option to “Switch to Windows Containers…”, this means you are on Linux Container.
- Open Ubuntu Command Shell and see whether Docker is running:
docker
- If you find
dockerhelp is showing that means Docker is running as Linux container - Build the image using the Docker file created by Visual Studio
- Browse to the directory where Docker File exists
- For me it is
cd /mnt/c/Users/sultan/source/repos/CoreWebApp4Docker
- Note that at WSL your Windows drive will be mounted under /mnt/
- Now build using docker build
docker build -t corewebapp4docker .
- We named the build as
corewebapp4dockerand the.at the end indicates the current directory where Docker Files exists - The name can be given as name:tag format otherwise it’ll be tagged as
corewebapp4docker:latest - The output will be like this:

- Now we’ll run the image
docker run -d -p 5000:80 --name corewebapp4docker1.0 corewebapp4docker
- The
-dis telling to run the image at background and show the container Id only.-pis saying to map host port 5000 to Docker port 80.--nameis naming the image and the last one is the image name that we’ve used during build. - Once done you can list the running image using
docker ps

- We can also view the image at Docker Desktop

- Now browse http://localhost:5000

- That’s all we are done with deploying our .Net core application to Docker.
Deploying on Windows Container
- Now we’ll deploy the same project to Windows Container.
- At first we need to stop and remove the existing image
- docker stop corewebapp4docker1.0
- docker rm corewebapp4docker1.0
- We can run
docker psto be sure that we are done - Now let’s change the container to Windows Container from Docker Desktop
- Now we will use Windows Power Shell to deploy and run
- Power Shell must be opened with Administrator privilage
- We’ll follow the same steps we’ve used for Linux containers
docker build -t corewebapp4docker .docker run -d -p 5000:80 --name corewebapp4docker1.0 corewebapp4docker
- And we are done. We can list the image using
docker ps. Or we can see the Docker Desktop Window. - The application will be browsable from http://localhost:5000
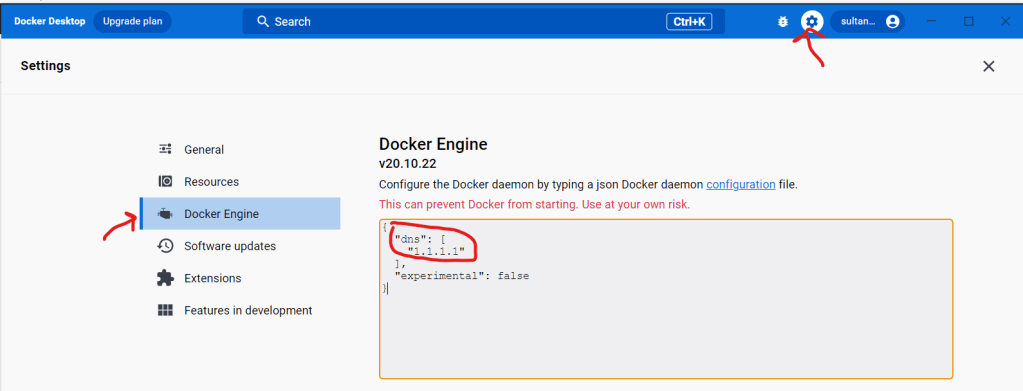
- There might be issues with accessing api.nuget.org to download nugget package. In that case at Docker –> Setting –> Docker Engine add the following json tag with the existing:
"dns" : ["1.1.1.1"]
- The setting will be look like
- Now this image is locally available. To share the image we have to publish the image to Docker Hub.
Publishing to Docker Hub
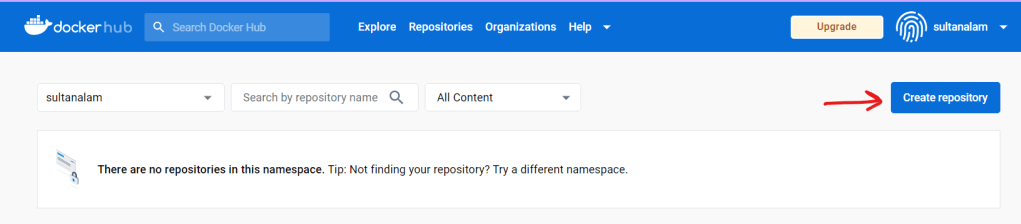
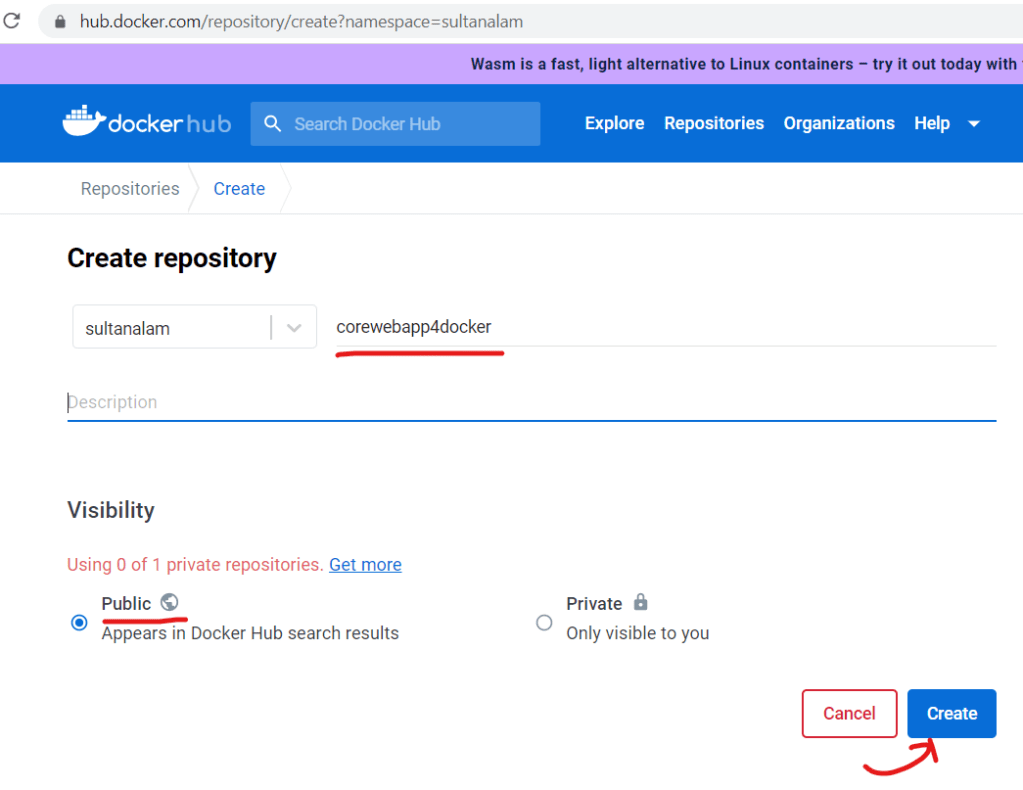
- To register the image into the Docker Hub we need to have an account over there.
- Go to https://hub.docker.com/ and create an account
- Now create a repository over there where we can publish the app.
- Now come on to the Power Shell again and login to Docker Hub with the user name just we’ve created
docker login -u sultanalam
- We need to tag the currently build image with the username/repository name we’ve just created
docker tag corewebapp4docker sultanalam/corewebapp4docker1.0
- Now pushing the image to the hub using the new tag
- docker push sultanalam/corewebapp4docker1.0

- The image will be available under the repository we’ve created

References:
