This article will describe the ways to enable a Windows 10 Machine to support docker.
You can run docker on Windows 10 using either of the following ways:
- Linux Container
- Windows Container
Enabling Linux Container:
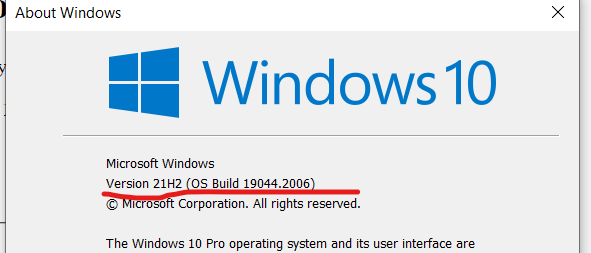
- The OS should be either Windows 10 64-bit Home or Pro 21H1 (build 19043) or higher. The version can be checked from PowerShell
winver
- 64-bit processor
- 4GB system RAM
- BIOS-level hardware virtualization support must be enabled in the BIOS settings
- The WSL2 (Windows Subsystem for Linux) feature must be enabled.
- Open PowerShell in Administrator mode and run
wsl --install
- You’ll be prompted for confirmation to install. Click yes to proceed.
- Once done the following installation screen will be shown:

- You need to reboot the system to effect the changes.
- After reboot you can find Ubuntu (this is the default distribution) at you program menu.
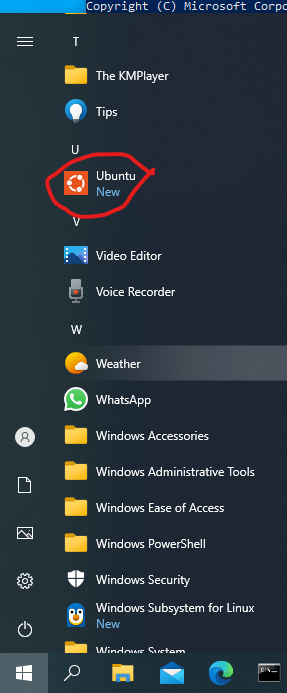
- Select Ubuntu to finish installation.
- You will be prompted for setting your UNIX user & password (which is not necessarily your windows credential but can be anything you prefer)

- The default UNIX/ Ubuntu user will be the username you set here.
- If you select Ubuntu from program menu once again you will get the Ubuntu terminal
- If you forget this default user password you can login using root and reset the passowrd.
- To change the default user to root run windows command prompt as Administrator
ubuntu config --default-user root
- Run Ubuntu from program menu once again and you’ll find the default user is set to root.
- To change password
passwd username
- Type the new password and reconfirm
- Once done you can change the default user again
- From PowerShell you can check the default distribution installed and can list down other distribution (if any) as well
wsl --list
Installing Docker:
Docker for Windows can be downloaded from: https://docs.docker.com/desktop/install/windows-install/
- Run the installer and Select “Use WSL2 instead of Hyper-V” option. However, if your Windows does not support Hyper-V (like you have Windows 10 Home Edition) you won’t get this option.
- You need to logout from Windows to finish the installation
- Once done you’ll find Docker Desktop is running

- From PowerShell or Ubuntu you run
docker
- Docker container on Windows can run on both as Linux Container and Windows Container
- Select Docker Desktop from task bar and you can switch between Linux and Windows Container

- As currently we have configured Docker for Linux Container (which is by default) so switching to Windows Container option are shown here
However switching from the taskbar won’t necessarily switch the container to Windows Container. Few more tasks are needed to be done as stated at the following section.
Enabling Windows Container:
- Windows Container can be installed only if you have Windows 10 Pro edition
- From start menu type “Turn Windows Feature on or off” and select Container & Hyper-V option
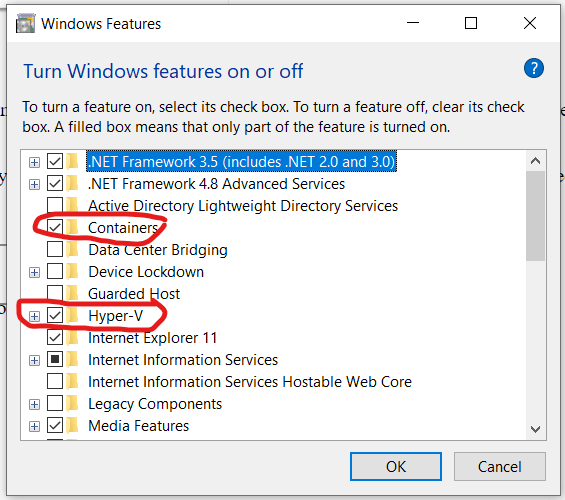
- Once installation is done you’ll need to restart the PC
References:
