In the first part of this article we’ve discussed the backup strategy and the process of taking full and differential backup including log and tail backup. But for large database the backup strategy require more thinking to ensure:
- Backup space availability – if the database backup size is 1 TB or more, it’s usual that a single backup drive may not be able to provide this space. In this case we can split the backup files into several pieces.
- Recovery time minimization – to restore and recover a database of 1 TB it’ll take longer time and the operations needs to keep down during the entire recovery process. We need a way to restore the most essential stuffs and bring the operation back.
In this article, we will discuss both the ways. Firstly, let’s have a look at the Split Backup, where we can split the backup files in pieces for any full backup or differential backup. Let’s use the same database that we’ve created in the first part https://sultanealam.com/2024/06/08/sql-server-backup-strategy-part-1/
We’ll demonstrate split backup for a full backup, the same thing can be used for differential or log backup.
-- splitting the backup in separate files
USE MASTER
GO
BACKUP DATABASE [DemoBkup] TO
	DISK = 'C:\BkupPlan\DemoBkUp\DemoBkup_Split1.BAK',
	DISK = 'C:\BkupPlan\DemoBkUp\DemoBkup_Split2.BAK'
GO

-- restore from the splits following the same sequence
USE MASTER
GO
RESTORE DATABASE [DemoBkup] FROM
	DISK = 'C:\BkupPlan\DemoBkUp\DemoBkup_Split1.BAK',
	DISK = 'C:\BkupPlan\DemoBkUp\DemoBkup_Split2.BAK'
GO
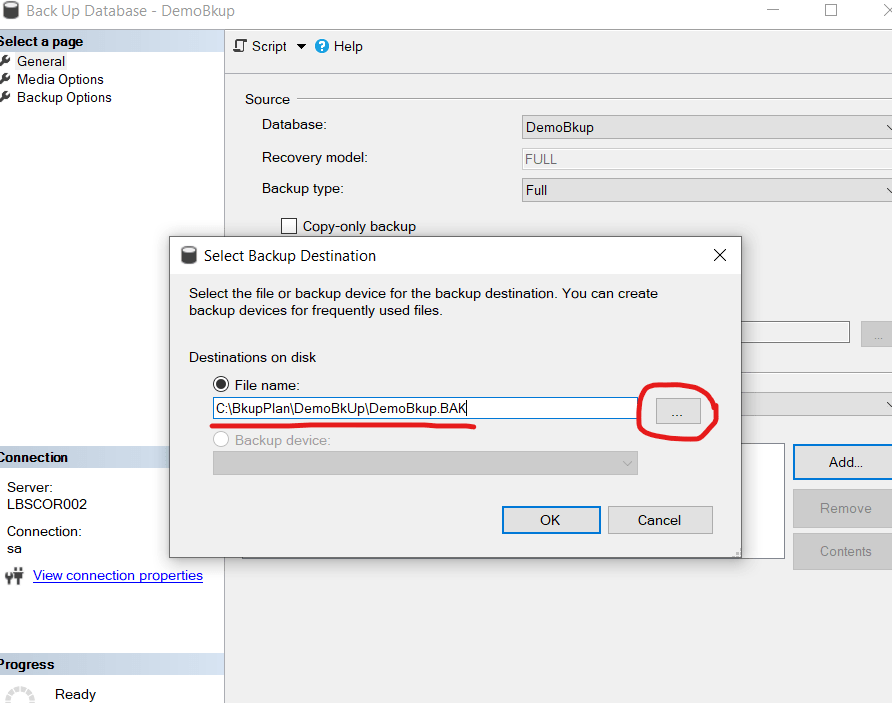
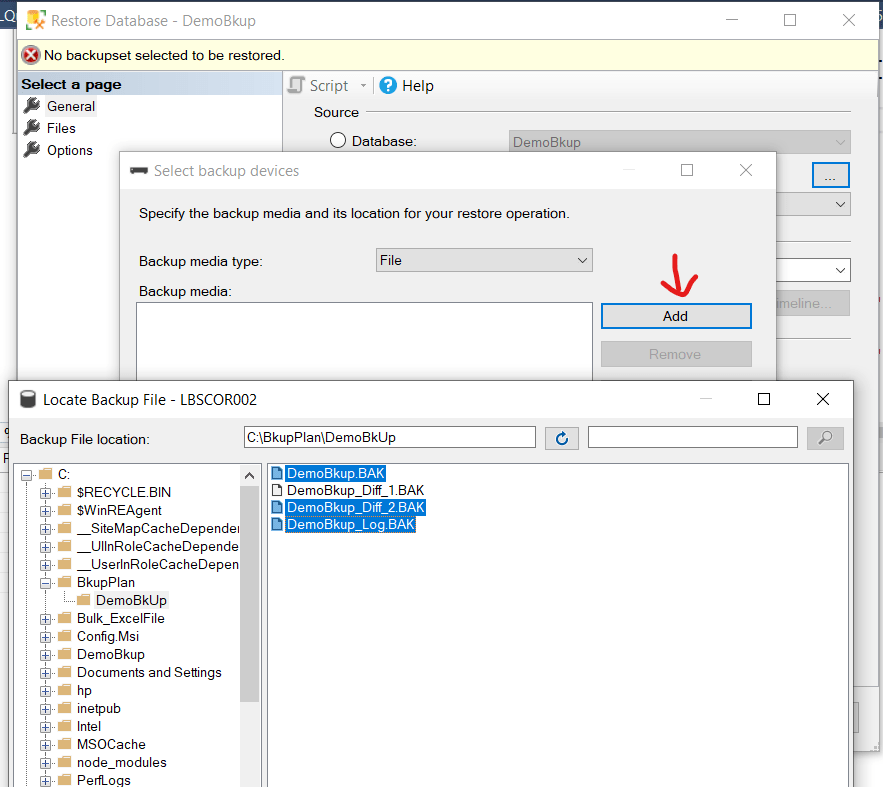
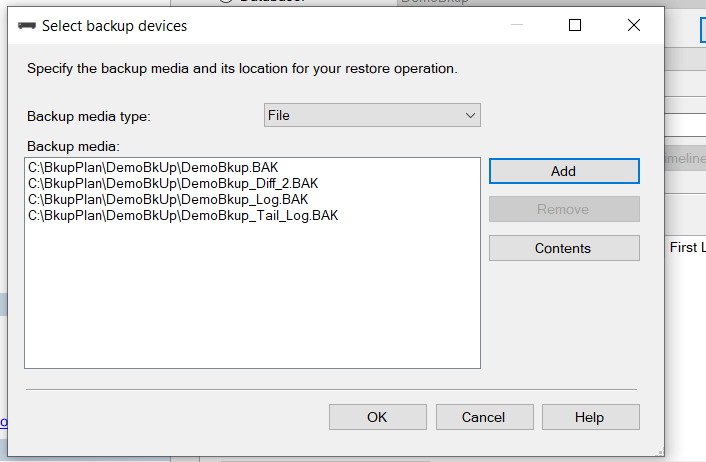
Here, we are splitting the backup into two pieces. We can put this two pieces into two different OS path based on the availability of space. We can use the SSMS to do the same. Just keep on adding more files while taking the backup.

To restore, we need to add all the parts:
-- restore from the splits following the same sequence
USE MASTER
GO
RESTORE DATABASE [DemoBkup] FROM
	DISK = 'C:\BkupPlan\DemoBkUp\DemoBkup_Split1.BAK',
	DISK = 'C:\BkupPlan\DemoBkUp\DemoBkup_Split2.BAK'
GO
Now, let’s move to the point where we need to restore the database partially to start the business. Well, this require upfront planning while designing the database architecture. This can only be used when you have file groups with partitioned tables and filegroup backup is taken in full recovery model. Let’s assume for the same database we’ve a transaction table having customer transaction. If the table is partitioned yearly which means data for 2023 in a separate partitioned file group and 2024 in another, then if we can restore Primary and the 2024 file group we can start the operations. Later, we can restore the other file groups. This way, we can achieve the RTO (Recovery Time Objective) as discussed on the first part of this article.
Firstly, let’s add two filegroup for 2023 and 2024.
-- Creating File Group with Single Data File
USE DemoBkup
GO

ALTER DATABASE [DemoBkup]
ADD FILEGROUP [DemoHist_2023]
GO

ALTER DATABASE [DemoBkup]
ADD FILEGROUP [DemoHist_2024]
GO

ALTER DATABASE [DemoBkup]
ADD FILE
( NAME = DemoHist_2023,
  FILENAME = 'C:\DemoBkup\DemoHist_2023.ndf',
  SIZE = 10240KB,
  MAXSIZE = UNLIMITED,
  FILEGROWTH = 10%)
TO FILEGROUP [DemoHist_2023]
GO

ALTER DATABASE [DemoBkup]
ADD FILE
( NAME = DemoHist_2024,
  FILENAME = 'C:\DemoBkup\DemoHist_2024.ndf',
  SIZE = 10240KB,
  MAXSIZE = UNLIMITED,
  FILEGROWTH = 10%)
TO FILEGROUP [DemoHist_2024]
GO
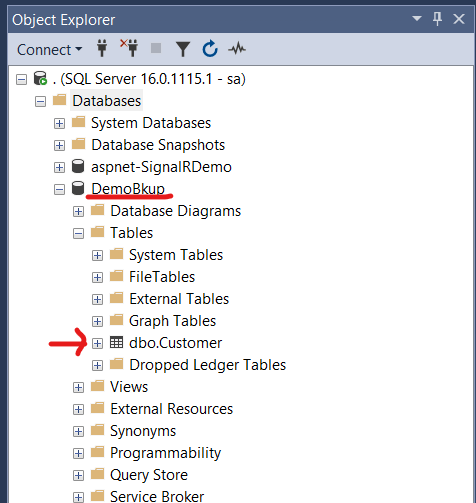
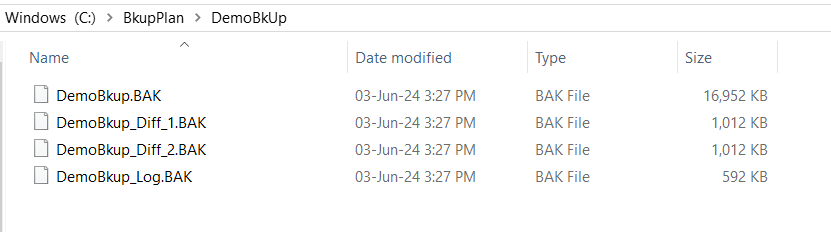
You can find the new file group at your explorer.

Let’s define the partition function and scheme. Then create a table on this scheme.
-- partition function
USE DemoBkup
GO
CREATE PARTITION FUNCTION [DemoBkup_PartitionRangeFunc] (DATETIME)
AS RANGE LEFT FOR VALUES
	(
	'2023-01-01',
	'2024-01-01'
	)
GO

-- partition scheme
USE DemoBkup
GO
CREATE PARTITION SCHEME [DemoBkup_PartitionScheme]
AS PARTITION [DemoBkup_PartitionRangeFunc]
TO ([Primary],[DemoHist_2023],[DemoHist_2024])
GO

-- Create table on Partition Scheme
CREATE TABLE CustomerTrans
(
	TransDt			DateTIME		NOT NULL,
	CustomerId		INT				NOT NULL,
	TransNo			INT				NOT NULL,
	TransAmount		NUMERIC(10,2)	NOT NULL,
	CONSTRAINT PK_CustomerTrans PRIMARY KEY CLUSTERED ([TransDt],[CustomerId],[TransNo] ASC) ON [DemoBkup_PartitionScheme]([TransDt]),
	CONSTRAINT FK_CustomerId FOREIGN KEY ([CustomerID]) REFERENCES [Customer]([CustomerId])
)ON [DemoBkup_PartitionScheme]([TransDt])
GO
This ensures that all data on or before 2023-01-01 will be inserted into file group Primary. Data after 2023-01-01 to 2024-01-01 will be inserted to DemoHist_2023. Data after 2024-01-01 will be inserted into file group DemoHist_2024. Let’s insert few rows so that each file group have some rows.
-- Primary
INSERT INTO CustomerTrans (CustomerId,TransDt,TransNo,TransAmount) VALUES (1,'2023-01-01',1,100)
GO

-- DemoHist_2023
INSERT INTO CustomerTrans (CustomerId,TransDt,TransNo,TransAmount) VALUES (2,'2023-01-02',1,200)
GO
INSERT INTO CustomerTrans (CustomerId,TransDt,TransNo,TransAmount) VALUES (3,'2023-12-31',1,300)
GO

-- DemoHist_2024
INSERT INTO CustomerTrans (CustomerId,TransDt,TransNo,TransAmount) VALUES (4,'2024-01-02',1,400)
GO
INSERT INTO CustomerTrans (CustomerId,TransDt,TransNo,TransAmount) VALUES (5,'2024-01-02',1,500)
GO
INSERT INTO CustomerTrans (CustomerId,TransDt,TransNo,TransAmount) VALUES (6,'2025-01-02',1,600)
GO
We can check how many rows are on each partition from sys.partitions.
-- all partionwise total row
SELECT *
FROM sys.partitions
WHERE OBJECT_NAME(OBJECT_ID)='CustomerTrans'
ORDER BY index_id,partition_number
The output will be 1 row in the first partition (Primary), 2 rows in the second (DemoHist_2023) and 3 in the third (DemoHist_2024)

Now, in case of recovery if we can restore the Primary & the recent year file group which is DemoHist_2024, we can bring back the database up. Because, DemoHist_2023 contains cold & immutable data for the last year and we do not need it immediately in case of recovery.
Before proceeding with backup let’s check what are the data we’ve so far:

Note that, the Customer table (demonstrated at part 1) reside on Primary File group. Now, let’s take a full backup by filegroup.
--Backup filegroups
USE MASTER
GO
BACKUP DATABASE [DemoBkup]
	FILEGROUP = 'PRIMARY',
	FILEGROUP = 'DemoHist_2023',
	FILEGROUP = 'DemoHist_2024'
	TO DISK = 'C:\BkupPlan\DemoBkUp\DemoBkup_File.BAK' WITH INIT
GO
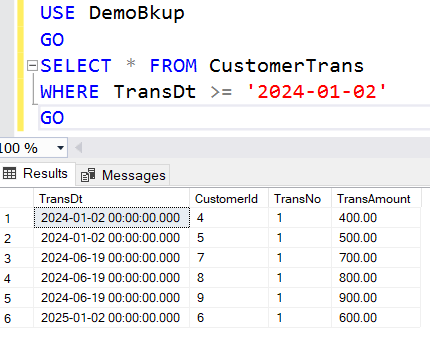
Let’s insert a new customer with transaction on current date.
-- Inserting Row
USE DemoBkup
GO
INSERT INTO Customer (CustomerId,CustomerName,CustomerEmail) VALUES (7,'Mahbub','mahbub@mahbub.com')
GO
INSERT INTO CustomerTrans (CustomerId,TransDt,TransNo,TransAmount) VALUES (7,'2024-06-19',1,700)
GO
Now, taking differential filegroup backup.
-- Differential Bkup
USE MASTER
GO
BACKUP DATABASE [DemoBkup]
	FILEGROUP = 'PRIMARY',
	FILEGROUP = 'DemoHist_2023',
	FILEGROUP = 'DemoHist_2024'
	TO DISK = 'C:\BkupPlan\DemoBkUp\DemoBkup_Diff_1.BAK' WITH INIT
GO
Let’s insert one more customer with transaction.
-- Inserting more row
USE DemoBkup
GO
INSERT INTO Customer (CustomerId,CustomerName,CustomerEmail) VALUES (8,'Rafi','rafi@rafi.com')
GO
INSERT INTO CustomerTrans (CustomerId,TransDt,TransNo,TransAmount) VALUES (8,'2024-06-19',1,800)
GO
Note that, for both the cases the Customer data reside at Primary File group but the transaction data are at the DemoHist_2024 filegroup. Let’s take the transaction log backup at this point.
-- Transaction Log Bkup
USE MASTER
GO
BACKUP LOG [DemoBkup]
	TO DISK = 'C:\BkupPlan\DemoBkUp\DemoBkup_Log.BAK'
	WITH NAME = 'DemoBkup-Log',
	DESCRIPTION = 'DemoBkup-Log'
GO
Inserting one more pair of rows and we’ll not take any backup after this insertion.
-- Inserting One more pair of rows
USE DemoBkup
GO
INSERT INTO Customer (CustomerId,CustomerName,CustomerEmail) VALUES (9,'Ashraf','ashraf@ashraf.com')
GO
INSERT INTO CustomerTrans (CustomerId,TransDt,TransNo,TransAmount) VALUES (9,'2024-06-19',1,900)
GO
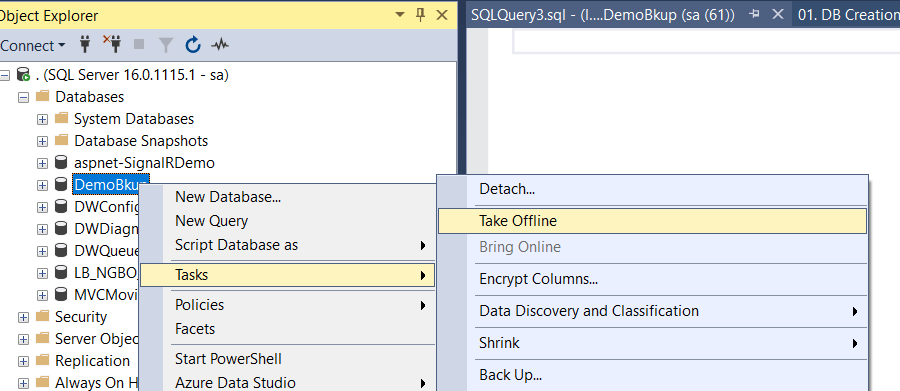
Let’s take the database offline now and drop the three data files Primary, DemoHist_2023 & DemoHist_2024. Then try to bring the database online. It won’t be up but the log will be available for tail backup. Please refer to Part 1 for detail to regenerate this scenario. However, please do not practice this at production.
Since, the log file is available let’s attempt the tail log backup before starting the restore and recovery.
USE MASTER
GO
BACKUP LOG [DemoBkup]
    TO DISK = 'C:\BkupPlan\DemoBkUp\DemoBkup_Tail_Log.BAK'
    WITH NORECOVERY,CONTINUE_AFTER_ERROR,
    NAME = 'DemoBkup-Tail',
    DESCRIPTION = 'DemoBkup-Tail'
GO
Now, we’ll restore the Primary & DemoHist_2024 data file from full, differential, transaction log and tail log backup and open the database.
-- Piecemeal Restore
USE MASTER
GO
RESTORE DATABASE [DemoBkup] FILEGROUP = 'Primary'
	FROM DISK = 'C:\BkupPlan\DemoBkUp\DemoBkup_File.BAK' WITH PARTIAL, NORECOVERY, REPLACE
GO

USE MASTER
GO
RESTORE DATABASE [DemoBkup] FILEGROUP = 'DemoHist_2024'
	FROM DISK = 'C:\BkupPlan\DemoBkUp\DemoBkup_File.BAK' WITH NORECOVERY
GO

-- Restore Differential
USE MASTER
GO
RESTORE DATABASE [DemoBkup] FILEGROUP = 'Primary'
	FROM DISK = 'C:\BkupPlan\DemoBkUp\DemoBkup_Diff_1.BAK' WITH PARTIAL, NORECOVERY, REPLACE
GO

USE MASTER
GO
RESTORE DATABASE [DemoBkup] FILEGROUP = 'DemoHist_2024'
	FROM DISK = 'C:\BkupPlan\DemoBkUp\DemoBkup_Diff_1.BAK' WITH NORECOVERY
GO

-- Restore Log
USE MASTER
GO
RESTORE DATABASE [DemoBkup]
	FROM DISK = 'C:\BkupPlan\DemoBkUp\DemoBkup_Log.BAK' WITH NORECOVERY
GO

-- Restore Tail Log
USE MASTER
GO
RESTORE DATABASE [DemoBkup]
    FROM DISK = 'C:\BkupPlan\DemoBkUp\DemoBkup_Tail_Log.BAK' WITH RECOVERY
GO
At this point, the database is up with Primary file group and latest transactional data. To check let’s query the Customer Table first.
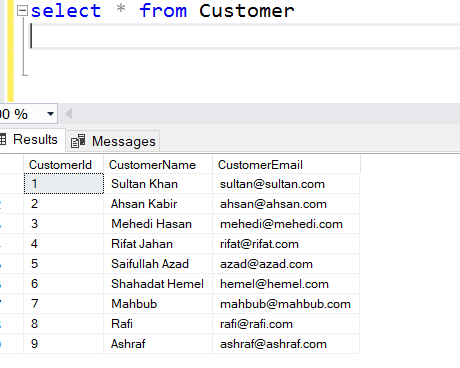
See, all customer are there even the customer with Id 9, after which we did not take any backup. But we retrieved it from the tail backup. Now, let’s try to query the CustomerTrans table.

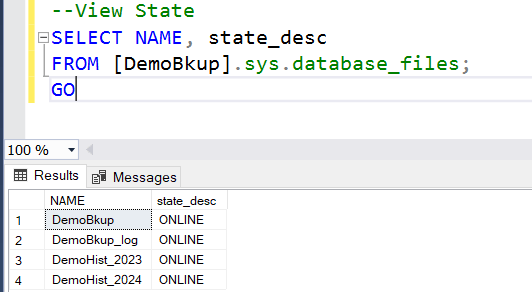
It’ll give an error telling that DemoHist_2023 is not accessible since we’ve not restore that filegroup. We can check the file group status:
SELECT NAME, state_desc
FROM [DemoBkup].sys.database_files;
GO
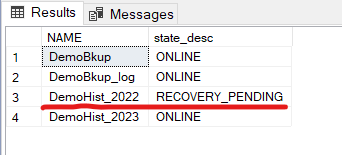
See, for this specific file group the status is RECOVERY_PENDING. But we still can query the current year data.
Therefore, by restoring the latest file group we can bring the business back and minimize the downtime. Later on, we can proceed with restoring the other filegroups. Let’s do it.
-- Restore Older year filegroup data
USE MASTER
GO
RESTORE DATABASE [DemoBkup] FILEGROUP = 'DemoHist_2023'
	FROM DISK = 'C:\BkupPlan\DemoBkUp\DemoBkup_File.BAK' WITH RECOVERY
GO

USE MASTER
GO
RESTORE DATABASE [DemoBkup] FILEGROUP = 'DemoHist_2023'
	FROM DISK = 'C:\BkupPlan\DemoBkUp\DemoBkup_Diff_1.BAK' WITH RECOVERY
GO

-- Restore Log again
USE MASTER
GO
RESTORE DATABASE [DemoBkup]
	FROM DISK = 'C:\BkupPlan\DemoBkUp\DemoBkup_Log.BAK' WITH RECOVERY
GO

-- Restore Tail Log again
USE MASTER
GO
RESTORE DATABASE [DemoBkup]
    FROM DISK = 'C:\BkupPlan\DemoBkUp\DemoBkup_Tail_Log.BAK' WITH RECOVERY
GO
At first, let’s check file group status. All file groups are online now.
If we check Customer & CustomerTrans table we can found all data are now up to date

That’s it, we are done with the complete recovery including the tail of the log. This piecemeal restore will minimize the business recovery time and will help DBA to restore the older data files outside transaction hour.
Apart from them, achieving faster recovery time the filegroup backup also help to restore a single missing or corrupted data file. To simulate the matter let’s take another full backup.
USE MASTER
GO
BACKUP DATABASE [DemoBkup]
	FILEGROUP = 'PRIMARY',
	FILEGROUP = 'DemoHist_2023',
	FILEGROUP = 'DemoHist_2024'
	TO DISK = 'C:\BkupPlan\DemoBkUp\DemoBkup_File.BAK' WITH INIT
GO
Now, let’s bring the database offline and delete a file.
-- Missing a Filegroup
USE MASTER
GO
ALTER DATABASE [DemoBkup]  SET OFFLINE
GO

-- Remove file from OS
EXEC xp_cmdshell 'del C:\DemoBkup\DemoHist_2023.ndf'
GO
By the way, xp_cmdshell to run OS level command is by default disabled. To enable this run the following.
-- Enabling Command Shell to issue OS command
USE [master]
GO
EXEC sp_configure
'show advanced option',
'1'
GO
RECONFIGURE WITH OVERRIDE
GO

EXEC sp_configure 'xp_cmdshell', 1
GO
RECONFIGURE
GO
However, better not to enable this feature at production. Now try to bring it back to online.
-- Bring the Database Online
ALTER DATABASE [DemoBkup]  SET ONLINE
GO
You’ll receive the following error.

To recover this filegroup from the backup set firstly we need to take a tail log backup.
-- Tail Log Bkup (take before any recovery starts)
USE MASTER
GO
BACKUP LOG [DemoBkup]
	TO DISK = 'C:\BkupPlan\DemoBkUp\DemoBkup_File_Tail_Log.BAK'
	WITH NORECOVERY,CONTINUE_AFTER_ERROR,	-- NORECOVERY ensures the DB will be at recovery mode
	NAME = 'DemoBkup-TailLog',
	DESCRIPTION = 'DemoBkup-TailLog'
GO
Now restore the missing file group followed by restoring the tail log.
-- Restoring only the missing filegroup
USE MASTER
GO

RESTORE DATABASE [DemoBkup] FILEGROUP = 'DemoHist_2023'
	FROM DISK = 'C:\BkupPlan\DemoBkUp\DemoBkup_File.BAK' WITH NORECOVERY
GO

-- Restore Tail Log
USE MASTER
GO
RESTORE DATABASE [DemoBkup]
	FROM DISK = 'C:\BkupPlan\DemoBkUp\DemoBkup_File_Tail_Log.BAK' WITH RECOVERY
GO
This will bring back the entire database to online.
Happy Restoring !!!