RabbitMQ, in today’s microservice era, becomes one of the most popular message brokers. It is open-source and have API for popular programming languages. The current stable version is 3.13 and it was originally developed to support AMQP 0-9-1 messaging protocol.
A Brief Introduction to Message Broker:
Message queueing is a way of exchanging data between different applications. It is a system that is used to define queues that accepts messages from a publisher asynchronously. Assume a microservice application where many services are communicating with each other through APIs. In such cases, the services should not communicate in a crisscross manner, rather they should use a service bus like RabbitMQ.
Installing RabbitMQ:
In this article we’ll demonstrate how to configure RabbitMQ on Ubuntu. We are assuming that you have an available Ubuntu installation. We will use RabbitMQ Apt Repositories available on Cloudsmith. RabbitMQ has provided a Quick Start Script for straight forward installation which is available at: https://www.rabbitmq.com/docs/install-debian. Let’s create a separate directory for the script:
sult@sultubu:~$ cd /home/sult/
sult@sultubu:~$ mkdir rmq
sult@sultubu:~$ cd rmq
sult@sultubu:~$ vi rmq.sh
Now put the below script to this file. However, it is strongly recommended to have the latest script from the mentioned URL at above.
#!/bin/sh

sudo apt-get install curl gnupg apt-transport-https -y

## Team RabbitMQ's main signing key
curl -1sLf "https://keys.openpgp.org/vks/v1/by-fingerprint/0A9AF2115F4687BD29803A206B73A36E6026DFCA" | sudo gpg --dearmor | sudo tee /usr/share/keyrings/com.rabbitmq.team.gpg > /dev/null
## Community mirror of Cloudsmith: modern Erlang repository
curl -1sLf https://github.com/rabbitmq/signing-keys/releases/download/3.0/cloudsmith.rabbitmq-erlang.E495BB49CC4BBE5B.key | sudo gpg --dearmor | sudo tee /usr/share/keyrings/rabbitmq.E495BB49CC4BBE5B.gpg > /dev/null
## Community mirror of Cloudsmith: RabbitMQ repository
curl -1sLf https://github.com/rabbitmq/signing-keys/releases/download/3.0/cloudsmith.rabbitmq-server.9F4587F226208342.key | sudo gpg --dearmor | sudo tee /usr/share/keyrings/rabbitmq.9F4587F226208342.gpg > /dev/null

## Add apt repositories maintained by Team RabbitMQ
sudo tee /etc/apt/sources.list.d/rabbitmq.list <<EOF
## Provides modern Erlang/OTP releases
##
deb [signed-by=/usr/share/keyrings/rabbitmq.E495BB49CC4BBE5B.gpg] https://ppa1.novemberain.com/rabbitmq/rabbitmq-erlang/deb/ubuntu jammy main
deb-src [signed-by=/usr/share/keyrings/rabbitmq.E495BB49CC4BBE5B.gpg] https://ppa1.novemberain.com/rabbitmq/rabbitmq-erlang/deb/ubuntu jammy main

# another mirror for redundancy
deb [signed-by=/usr/share/keyrings/rabbitmq.E495BB49CC4BBE5B.gpg] https://ppa2.novemberain.com/rabbitmq/rabbitmq-erlang/deb/ubuntu jammy main
deb-src [signed-by=/usr/share/keyrings/rabbitmq.E495BB49CC4BBE5B.gpg] https://ppa2.novemberain.com/rabbitmq/rabbitmq-erlang/deb/ubuntu jammy main

## Provides RabbitMQ
##
deb [signed-by=/usr/share/keyrings/rabbitmq.9F4587F226208342.gpg] https://ppa1.novemberain.com/rabbitmq/rabbitmq-server/deb/ubuntu jammy main
deb-src [signed-by=/usr/share/keyrings/rabbitmq.9F4587F226208342.gpg] https://ppa1.novemberain.com/rabbitmq/rabbitmq-server/deb/ubuntu jammy main

# another mirror for redundancy
deb [signed-by=/usr/share/keyrings/rabbitmq.9F4587F226208342.gpg] https://ppa2.novemberain.com/rabbitmq/rabbitmq-server/deb/ubuntu jammy main
deb-src [signed-by=/usr/share/keyrings/rabbitmq.9F4587F226208342.gpg] https://ppa2.novemberain.com/rabbitmq/rabbitmq-server/deb/ubuntu jammy main
EOF

## Update package indices
sudo apt-get update -y

## Install Erlang packages
sudo apt-get install -y erlang-base \
                        erlang-asn1 erlang-crypto erlang-eldap erlang-ftp erlang-inets \
                        erlang-mnesia erlang-os-mon erlang-parsetools erlang-public-key \
                        erlang-runtime-tools erlang-snmp erlang-ssl \
                        erlang-syntax-tools erlang-tftp erlang-tools erlang-xmerl

## Install rabbitmq-server and its dependencies
sudo apt-get install rabbitmq-server -y --fix-missing
Make the file executable and run:
sult@sultubu:~$ chmod +x rmq.sh
sult@sultubu:~$ ./rmq.sh
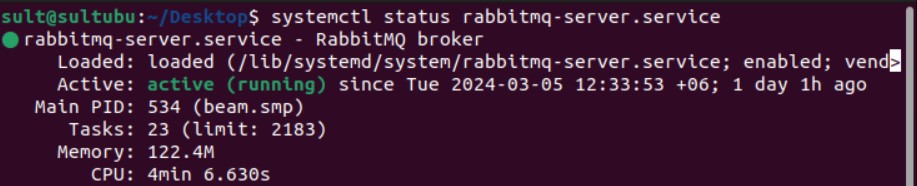
Once done you can check that RabbitMQ service is installed at your server. It’ll run as a non-privelege user rabbitmq. To check the service status:
sult@sultubu:~$ systemctl status rabbitmq-server.service
You can start/ stop the service:
sult@sultubu:~$ systemctl stop rabbitmq-server.service

sult@sultubu:~$ systemctl start rabbitmq-server.service
On the next step, we will enable management plugin for web management console.
sult@sultubu:~$ sudo rabbitmq-plugins enable rabbitmq_management

You can check the list of enabled plugin:
sult@sultubu:~$ sudo rabbitmq-plugins list

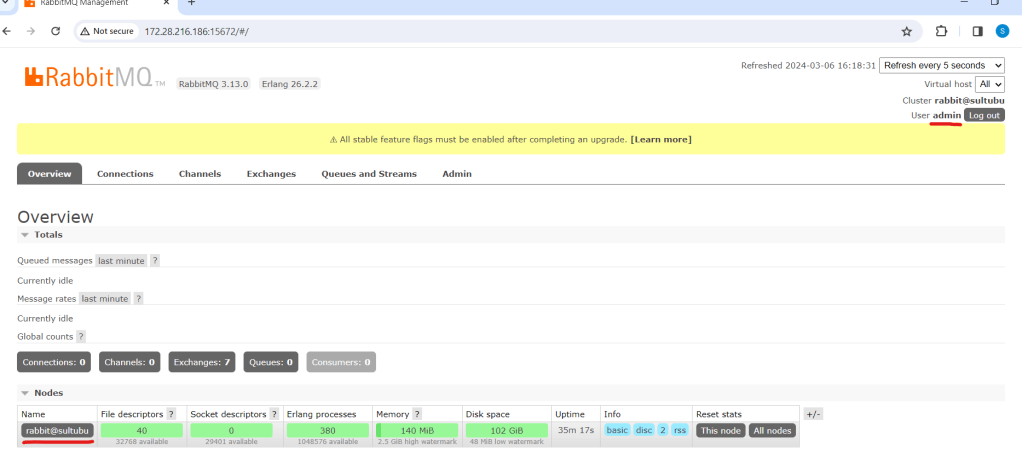
It’ll enable the web management with default user & password guest & guest respectively at port 15672.

This can be browsed from the localhost only http://localhost:15672 because guest user by default can’t access from outside. Now we’ll create an admin user with password admin123.
sult@sultubu:~$ sudo rabbitmqctl add_user admin admin123

Next this user needs to give the Administrator role:
sult@sultubu:~$ sudo rabbitmqctl set_user_tags admin administrator

The final thing on successful user creation is to allow the user for all virtual host:
sult@sultubu:~$ sudo rabbitmqctl set_permissions -p "/" "admin" ".*" ".*" ".*"

Now you can login using this user from the network. However, the mentioned port must be allowed at Ubuntu firewall. For the ease of configuration we are just disabling the firewall for the time being:
sult@sultubu:~$ sudo ufw disable

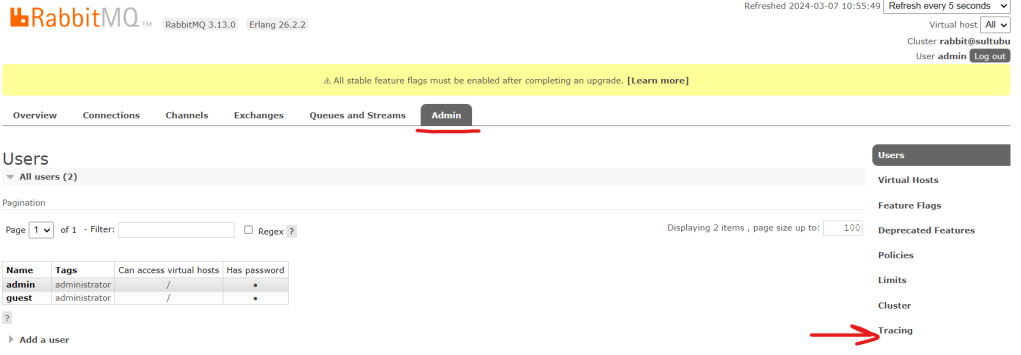
Now let us login from the network http://<rabitmq-server-ip>:15672
We can check the user list that we’ve just created. Click on “Admin” tab:

Exchange & Queue:
As discussed at the beginning, RabbitMQ works as publisher-subscriber or producer-consumer model. The terms are used interchangeably.
- A publisher/producer publishes message to exchange with binding key and queue name.
- Exchange route the message to designated queue.
- A subscriber/consumer subscribe to that Queue will receive the message and send acknowledgement.
The bounding between exchange and queue are done by routing key. There are different type of exchanges like direct, headers, topic and fanout. For detail discussion of the exchanges kindly refer to the RabbitMQ tutorial https://www.rabbitmq.com/tutorials.
You can browse the list of exchanges from the web console:

Except “MyRMQEx”, the other exchanges are created by default during installation. Our exchange “MyRMQEx” is a direct exchange and it is bound to a queue “MyRMQQu”.

Simply, a Queue is bound to an Exchange using the Routing Key. We’ve kept the Routing Key empty so the exchange is directly bound to the Queue. You can see the Queue list from Admin panel:

For more detail on Exchange & Queue creation, binding and messaging please refer to my article https://sultanealam.com/2024/03/11/implement-rabbitmq-with-net-core.
Finally, we want to enable the message tracing and logging so that we can check the message comes and leave to this Queue. RabbitMQ has a “Firehose” tracer that enables the message tracing https://www.rabbitmq.com/docs/firehose.
However, we’ll use the GUI plugin https://www.rabbitmq.com/blog/2011/09/09/rabbitmq-tracing-a-ui-for-the-firehose for this. We need to enable the plugin:
sult@sultubu:~$ sudo rabbitmq-plugins enable rabbitmq_tracing

Once tracing is enabled you can find it under admin tab.
Now, let’s create a trace for the Queue “MyRMQQu”:

Let’s use the queue name as trace name, you can use any other name as well. I’ve kept the same credential that I’ve used for web console for the tracer connection. The pattern is used “#” to trace all incoming and outgoing message. Click Add Trace to complete and you will find the tracer is added.

The Trace of file size will grow once message are published and subscribed. We can click on the Trace log file name to view the log entry:

Moreover, the trace log can be found from shell as well. You need to be the root used to view the log:
sult@sultubu:~$ su -
Password:
root@sultubu:~# cd /var/tmp/rabbitmq-tracing/
root@sultubu:/var/tmp/rabbitmq-tracing# ll
total 24
drwxr-x--- 2 rabbitmq rabbitmq 4096 মার্চ 6 18:02 ./
drwxrwxrwt 12 root root 4096 মার্চ 7 04:36 ../
-rw-r----- 1 rabbitmq rabbitmq 14000 মার্চ 6 18:32 MyRMQQu.log
The MyRMQQu.log is our trace file. We can tail the log from here:
root@sultubu:/var/tmp/rabbitmq-tracing# tail -f MyRMQQu.log
Connection:   172.28.208.1:14010 -> 172.28.216.186:5672
Virtual host: /
User:         admin
Channel:      1
Exchange:     MyRMQEx
Routing keys: [<<>>]
Queue:        MyRMQQu
Properties:   []
Payload:
{"TransactionId":15,"TransactionAmount":15000.0,"TransactionDate":"2024-03-06T18:03:03.1589113+06:00"}
The default RabbitMQ log is available at /var/log/rabbitmq/.
That’s all about the installation of RabbitMQ on Ubuntu. Please see my other article to know how we can implement a Producer and consumer using .Net Core: https://sultanealam.com/2024/03/11/implement-rabbitmq-with-net-core/
Happy Messaging !!!
