Implement RabbitMQ with .Net Core

To have a basic introduction with RabbitMQ and message queueing please refer to my article https://sultanealam.com/2024/03/11/configuring-rabbitmq-on-ubuntu/ which discussed installing RabbitMQ on Ubuntu. However, this article will use RabbitMQ from a Docker Image.

Introduction to Message Broker:

Before diving into the implementation let’s consider few use cases where message queueing can be a good choice. A publisher/producer can be any software program e.g. an online banking application that can publish message whenever a transaction happen so that the subscriber (another application) of that message can use that information to communicate somewhere else. This publisher-subscriber communication is usually asynchronous and they work independently. Therefore, for any reason if the subscriber/consumer is down, it won’t affect the producer to push message to the queue. Later on, whenever the consumer is up it can process the message asynchronously. This publisher-subscriber or producer-consumer architecture is the core of the message broking service and this makes this methodology so popular for microservice based architecture.

Another popular example is an e-commerce application where placing order is basically publishing an order detail to the message queue and there can be several consumer that is using this message to process. As for example, the shipping consumer can use the published data for prepare shipping, the email consumer can use it for sending email to client, the inventory consumer can update the inventory and so on.

Implementation:

To write our demo application, we will develop a single producer and single consumer where the producer will publish the message to a docker hosted message queue locally. The subscriber will consume the message from the queue.

To start with, let us deploy a RabbitMQ docker image:

docker run -it --rm --name rabbitmq -p 5672:5672 -p 15672:15672 rabbitmq:3.13-management

TO configure docker on Windows kindly refer to my article https://sultanealam.com/2023/02/22/configuring-docker-on-windows-10/

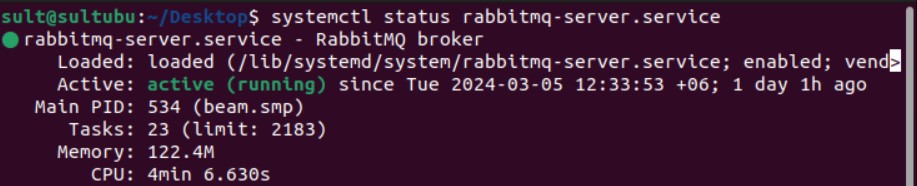
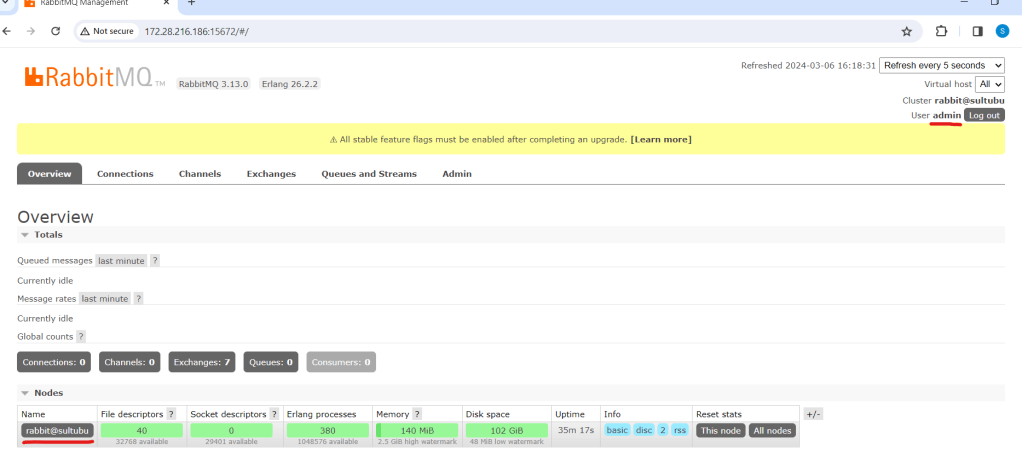
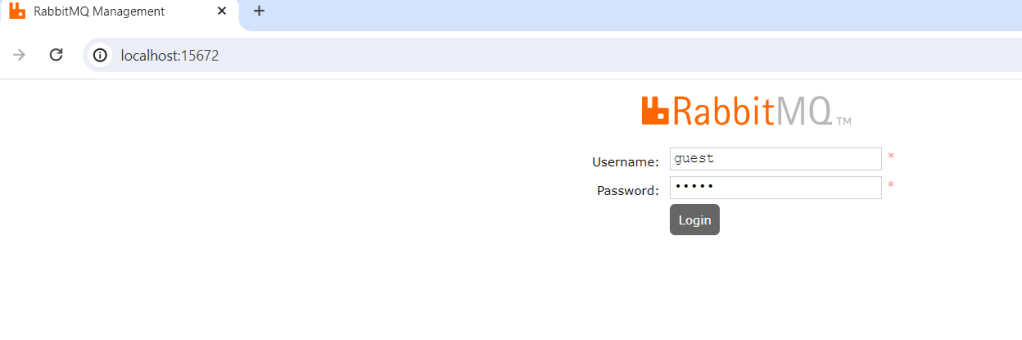
It’ll run a RabbitMQ server at localhost port 5672 with default user & password (guest & guest respectively). You can browse the RabbitMQ management at: http://localhost:15672 and login using this default credential.

If you want to run a full installation of RabbitMQ kindly refer to my article https://sultanealam.com

Developing the publisher:

  1. Create a .Net Core Console Application
  2. Implement IHostedService to run the console as background task
  3. Activate Scoped Service to use Dependency Injection
  4. Create RabbitMQ Producer Interface & it’s implementation
  5. Publish Deposit Message to the RabbitMQ for consuming

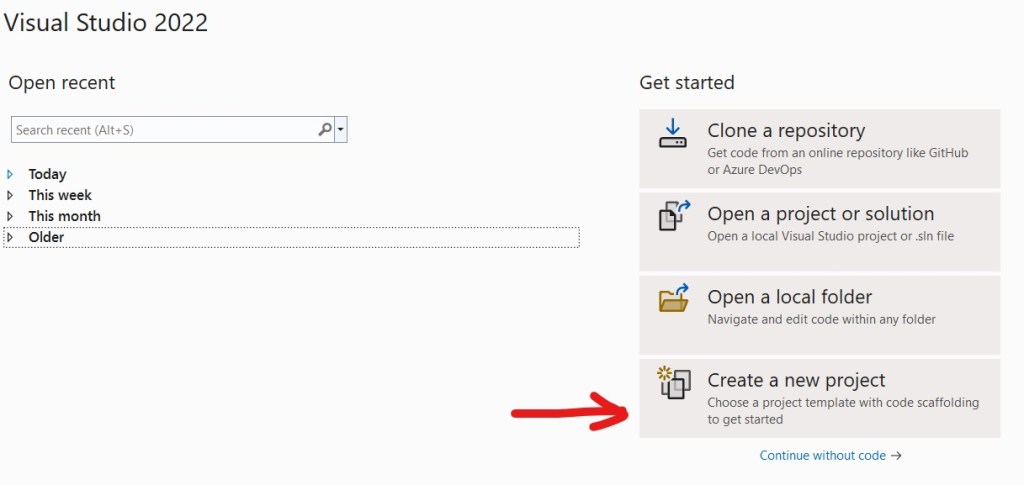
Open Visual Studio 2022 and select new project:

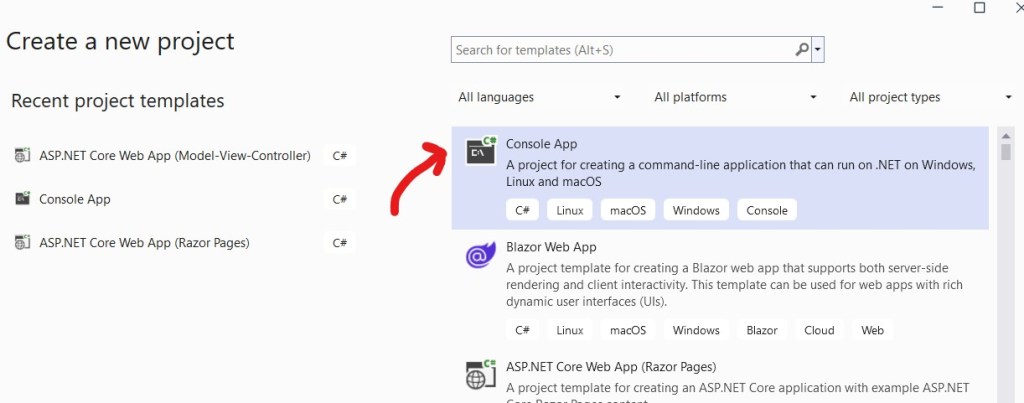
Select Console Application:

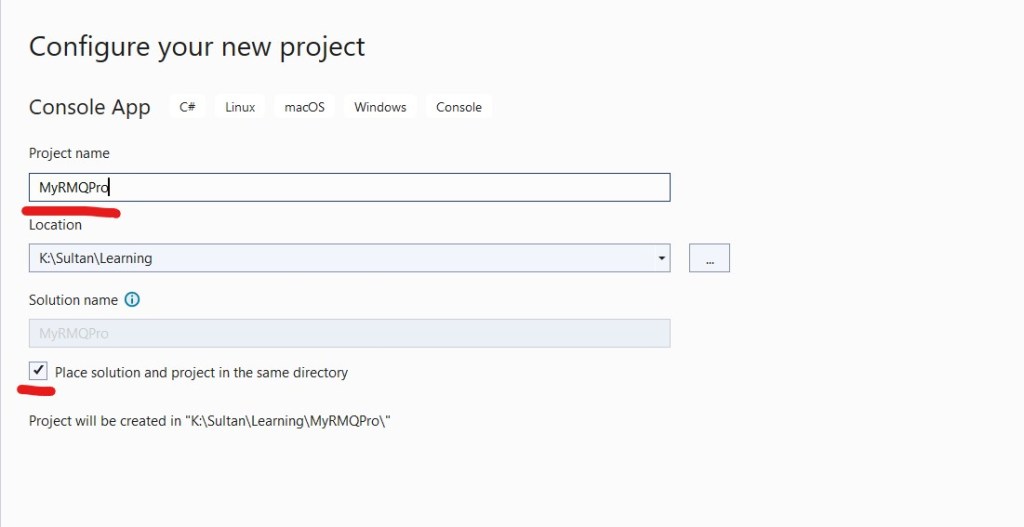
Enter Project Name for Publisher/ Producer MyRMQPro and click next:

Select the latest framework:

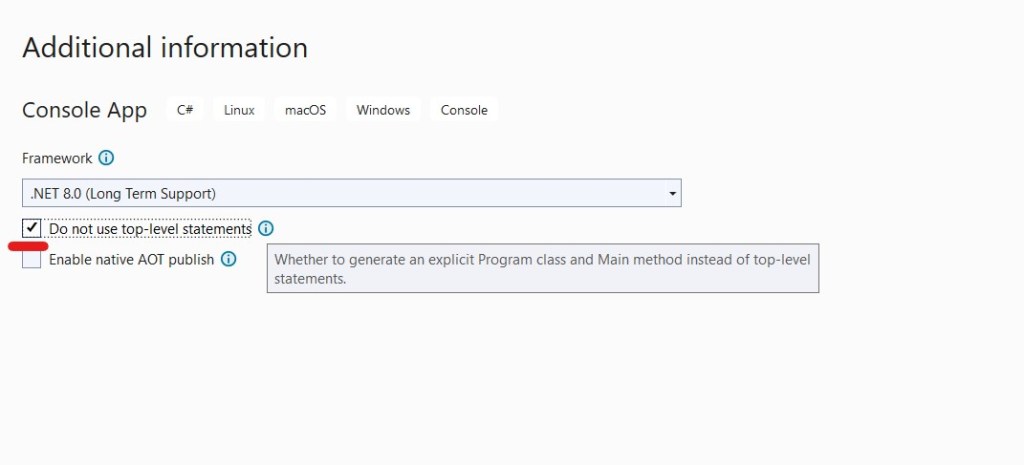
We’ve selected “Do not use top-level statements” because personally we prefer to have explicit Program class for better readability.

Now let’s install the necessary packages:

From settings check that nugget.org should set as the package source:

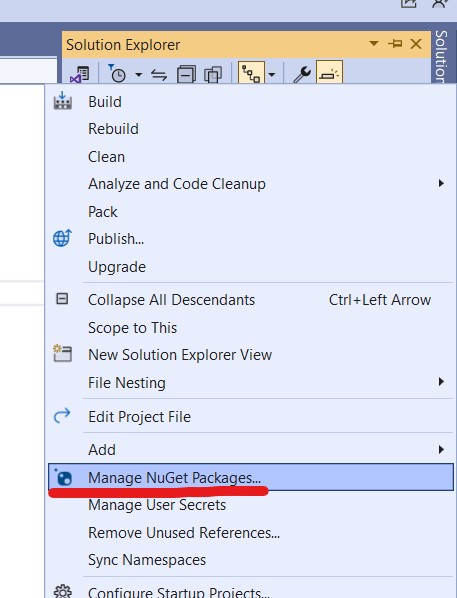
Go to Manage Nugget Packages again and search for RabbitMQ.Client

Install the latest stable version.

Similarly we also need to install the following nugget packages

  • Newtonsoft.Json
  • Microsoft.Extensions.Hosting
  • Microsoft.Extensions.DependencyInjection

Now let us create the RabbitMQ Producer Interface and it’s implementation.

namespace MyRMQPro
{
    public interface IRabbitMQProducer
    {
        public void SendMessage<T>(T message);        
    }
}

We’ll implement this interface along with IDisposable

internal class RabbitMQProducer : IDisposable, IRabbitMQProducer
{
        public RabbitMQProducer(IConfiguration config)
        {
            HostName = config["RMQ:HostName"];
            Port = config.GetValue<int>("RMQ:Port");
            UserName = config["RMQ:UserName"];
            Password = config["RMQ:Password"];
            Exchange = config["RMQ:Exchange"];
            Type = config["RMQ:Type"];
            Queue = config["RMQ:Queue"];
        }

}

The constructor will receive all the connection parameter usually from the setting file like the following:

{  
  "RMQ": {
    "HostName": "localhost",
    "Port": "5672",
    "UserName": "guest",
    "Password": "guest",
    "Exchange": "MyRMQEx",
    "Type": "direct",
    "Queue": "MyRMQQu"
  }
}

We will explain the detail shortly. Before that, let us come to the SendMessage method which will create the connection to exchange and queue and process message for sending.

public void SendMessage<T>(T message)
{
    

So, at the very beginning we are establishing the connection with the RabbitMQ server. It requires the HostName, Port, UserName & Password. For our docker image the host is localhost, the default port is 5672, default user & password both are guest. Once the connection is creating we are creating the channel.

    //Rabbit MQ Server    
    var factory = new ConnectionFactory
    {
        HostName = HostName,
        Port = Port,
        UserName = UserName,
        Password = Password
    };
    //Create the RabbitMQ connection
    _connection = factory.CreateConnection();
    //Creating channel with session and model    
    _channel = _connection.CreateModel();    

The next part is declaring the Exchange. To do so, we need to tell the Exchange name which is “MyRMQEx” from the setting file. Then we are telling the exchange type which is “direct” from the setting. The Direct Exchange is simple, the message goes to the Queue which binding key exactly matches the routing key of the message. In this case, we are simply keeping the routing key to empty, so any consumer subscribing to this Queue having empty routing key can consume the message published from here. Apart from Direct Exchange there are other exchanges like topic, headers and fanout. Though we are receiving the Exchange Type from settings, there is a class ExchangeType which can be used to set the type like ExchangeType.Direct. We are declaring the exchange durable and it won’t be deleted even after there are no producer.

     //Declaring Exchange
    _channel.ExchangeDeclare(Exchange, Type, durable: true, autoDelete: false);

Now, we will declare the Queue and bind it to the exchange. The Queue name is taken from the setting which is “MyRMQQu”.

    //Declaring the queue
    _channel.QueueDeclare(Queue, durable: true, exclusive: false, autoDelete: false);
    _channel.QueueBind(Queue, Exchange, string.Empty);
 

Like the exchange we are declaring the Queue as durable with autoDelete to false. We are also setting exclusive to false so the Queue will be available outside it’s declaring connection.

The final step is to serialize the message and publish.

            //Serialize the message
            var json = JsonConvert.SerializeObject(message);
            var body = Encoding.UTF8.GetBytes(json);
            //put the data on to the product queue
            _channel.BasicPublish(exchange: Exchange, routingKey: String.Empty, body: body);
            Console.WriteLine($"Message published: {json}");            

That’s all with the publishing the message. We need to implement the IDisposable to close the open connection and channel.

 protected virtual void Dispose(bool disposing)
 {
     if (!disposedValue)
     {
         if (disposing)
         {
             _channel.Close();
             _connection.Close();
         }                
         disposedValue = true;
     }
 }
 public void Dispose()
 {
     // Do not change this code. Put cleanup code in 'Dispose(bool  disposing)' method
     Dispose(true);
     GC.SuppressFinalize(this);
 }

Now, let’s implement the IHosted Service for background job which will produce random message and pushed to the exchange.

public Task StartAsync(CancellationToken cancellationToken)
{
    for (int i = 1; i <= 15; i++)
    {
        Deposit deposit = new Deposit(i, i*1000,DateTime.Now);
        _rabbitMQProducer.SendMessage(deposit);            
    }
    return Task.CompletedTask;
}
public Task StopAsync(CancellationToken cancellationToken)
{
    return Task.CompletedTask;
} 

We’ve initiated a POCO class Deposit to simulate the message:

public class Deposit
{
    public int TransactionId { get; set; }
    public decimal TransactionAmount { get; set; }
    public DateTime TransactionDate { get; set; }

    public Deposit(int transactionId, decimal transcationAmount, DateTime transactionDate)
    {
        TransactionId = transactionId;
        TransactionAmount = transcationAmount;
        TransactionDate = transactionDate;
    }
}

The main program will create the HostBuilder to activate scoped service and create the instance:

 static void Main(string[] args)
 {           
     Host.CreateDefaultBuilder()
         .ConfigureServices((context, services) =>
         {
             var config = context.Configuration;
             // Host
             services.AddHostedService<ProducerHost>();                                        
             // RabbitMQ
             services.AddSingleton<IRabbitMQProducer,RabbitMQProducer>(i => new RabbitMQProducer(config));
         })
         .Build()
         .Run();
 }

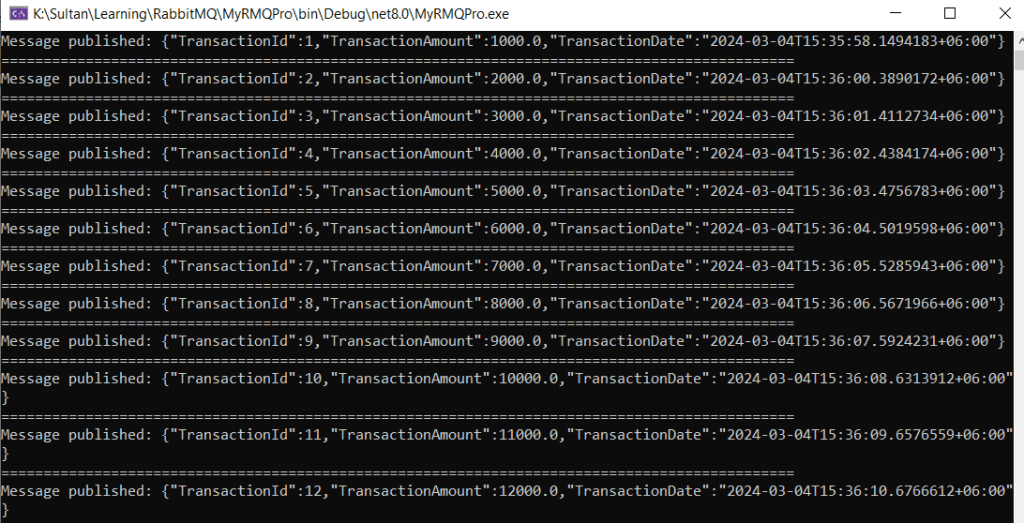
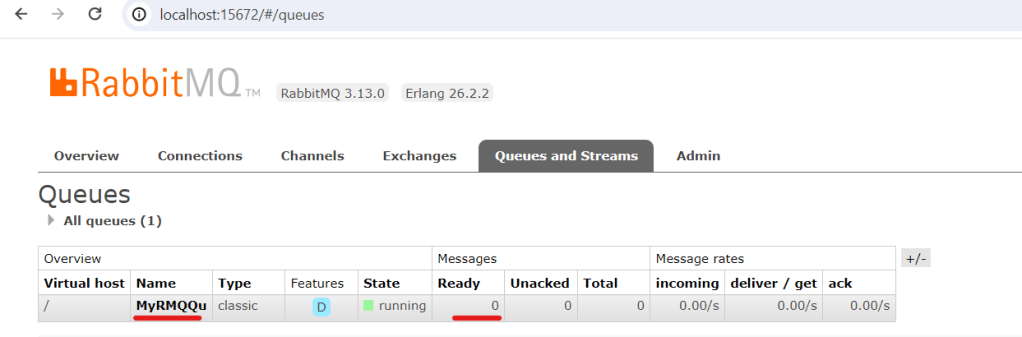
Now if we run the producer we can find the deposit message are printed to the screen and we can find them at our RabbitMQ admin dashboard.

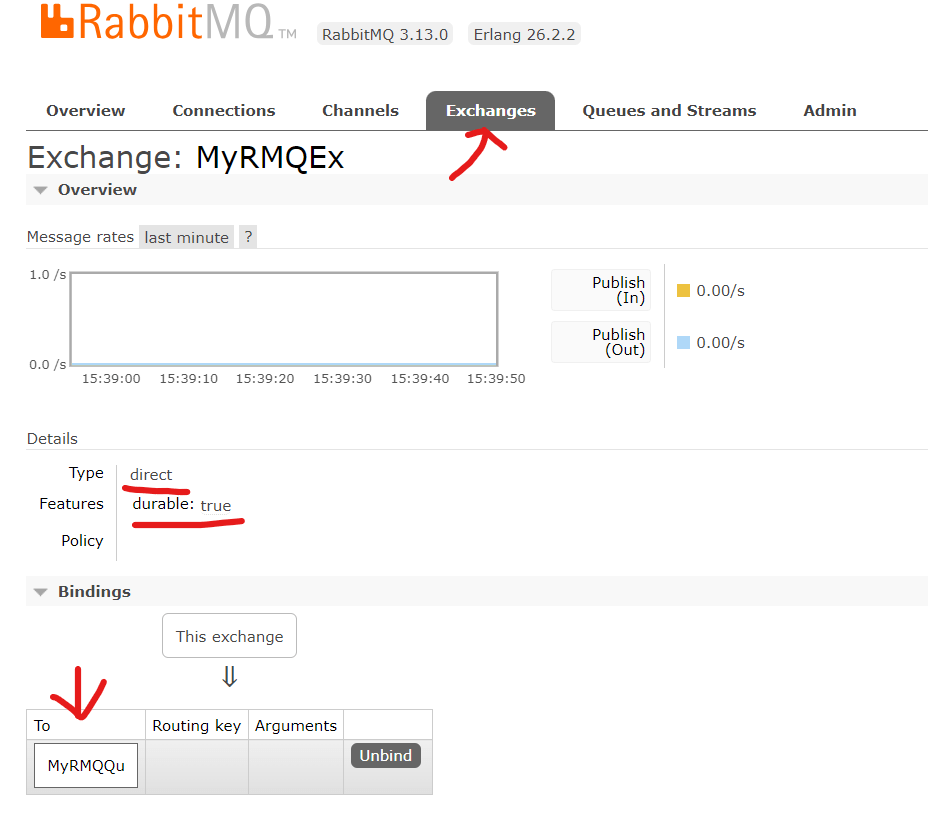
The Exchange can also be found here with the Queue binding:

Developing the consumer:

Now we’ll create a consumer to process all those published messages. The to do things are almost same lie the producer:

  1. Create a .Net Core Console Application
  2. Implement IHostedService to run the console as background task
  3. Activate Scoped Service to use Dependency Injection
  4. Create RabbitMQ Consumer Interface & it’s implementation
  5. Consume Deposit Message from the RabbitMQ that have already published

Follow the same step that we did above for publisher to create a .net console application and install the nugget packages. Then create the RabbitMQ consumer and it’s implementation:

namespace MyRMQCon.RMQ
{
    public interface IRabbitMQConsumer
    {
        public void ReceiveMessage(Func<string, bool> callback);
    }
}

Like the producer we’ll implement this interface along with IDisposable:

public class RabbitMQConsumer : IDisposable, IRabbitMQConsumer
{    
    public RabbitMQConsumer(IConfiguration config)
    {
        HostName = config["RMQ:HostName"];
        Port = config.GetValue<int>("RMQ:Port");
        UserName = config["RMQ:UserName"];
        Password = config["RMQ:Password"];
        Exchange = config["RMQ:Exchange"];
        Type = config["RMQ:Type"];
        Queue = config["RMQ:Queue"];
        FetchSize = config.GetValue<ushort>(config["RMQ:FetchSize"]);
    }

The only difference from the producer is the FetchSize which we’ll describe soon. The setting file will look like the producer except the addition of the FetchSize:

{
  "RMQ": {
    "HostName": "localhost",
    "Port": "5672",
    "UserName": "guest",
    "Password": "guest",
    "Exchange": "MyRMQEx",
    "Type": "direct",
    "Queue": "MyRMQQu",
    "FetchSize": 10
  }
}

The ReceiveMessage will receive a Func delegate returning boolean. The callback function will be implemented at the Hosted Service. We’ve the same program flow up to the Queue binding like the Producer:

        public void ReceiveMessage(Func<string, bool> callback)
        {
            //Rabbit MQ Server            
            var factory = new ConnectionFactory
            {
                HostName = HostName,
                Port = Port,
                UserName = UserName,
                Password = Password
            };
            //Create the RabbitMQ connection
            _connection = factory.CreateConnection();
            //Creating channel with session and model
            _channel = _connection.CreateModel();
            //Declaring Exchange
            _channel.ExchangeDeclare(Exchange, Type, durable: true, autoDelete: false);
            //Declaring the queue
            _channel.QueueDeclare(Queue, durable: true, exclusive: false, autoDelete: false);
            //Binding Queue to Exchange
            _channel.QueueBind(Queue, Exchange, string.Empty);

Now we need to tell the fetch size. Fetch size is the number of message a consumer fetch in case there are multiple consumer running to distribute the load.

//The first Param prefetchSize must be 0 which is the only implementation RabbitMQ.Client currently have
_channel.BasicQos(0, FetchSize, false);

Now, we’ll create the event handler which will be fired whenever there are any message at the Queue and it’ll subsequently invoke the function.

//Setting event object which listen message from chanel which is sent by producer
var consumer = new EventingBasicConsumer(_channel);
consumer.Received += (sender, eventArgs) =>
{    
    var body = eventArgs.Body.ToArray();
    var message = Encoding.UTF8.GetString(body);
    Console.WriteLine($"Message received: {message} at {DateTime.Now}");
    bool success = callback.Invoke(message);
    if (success)
    {
        //Will acknowledge on success only :: auto acknowledgement must be false on channel
        _channel.BasicAck(eventArgs.DeliveryTag, false);
        Console.WriteLine($"Message Acknowledged.");
    }
    else
    {
        //Rejecting and requeuing (requeue starts processing after reaching the fetch count for current fetch)
        _channel.BasicReject(eventArgs.DeliveryTag, true);
    }
};

We are acknowledging the message after the successful invocation of the callback function. It will ensure that the message won’t leave the queue until the processing is successful. In addition, message that failed to process during invoking are requeuing. Requeued message are automatically reprocessed by consumer until it succeed.

Finally we need to call BasicConsume outside the event handler with setting auto acknowledge to false.

//We are not auto acknowledging (autoAck), rather on successful consume we'll do that on each Invoke            
_channel.BasicConsume(queue: Queue, autoAck: false, consumer: consumer);

The next part is to implement the IDisposable which is exactly the same thing we did for the producer. So, I am not repeating the code.

Now, let’s implement the IHosted service for the consumer.

public Task StartAsync(CancellationToken cancellationToken)
{
    _rabbitMQConsumer.ReceiveMessage(ProcessMessage);
    return Task.CompletedTask;            
}
public Task StopAsync(CancellationToken cancellationToken)
{
    return Task.CompletedTask;
}

The ReceiveMessage will Invoke the ProcessMessage to process the job

 public bool ProcessMessage(string message)
 {
     Deposit deposit = JsonConvert.DeserializeObject<Deposit>(message);            
     if (deposit != null)
         return true;
     return false;
 }

The Deposit POCO class is already discussed at the Producer section above. On successful processing it’ll return true so the message will be acknowledged and leave the queue.

Like the Producer Main Program, the Consumer Main Program will also create the HostBuilder to activate scoped service and create the instance:

static void Main(string[] args)
{
    Host.CreateDefaultBuilder()
        .ConfigureServices((context, services) =>
        {
            var config = context.Configuration;
            // Host
            services.AddHostedService<ConsumerHost>();
            // RabbitMQ
            services.AddSingleton<IRabbitMQConsumer, RabbitMQConsumer>(i => new RabbitMQConsumer(config));
        })
        .Build()
        .Run();
}

Now if we run the consumer we’ll find all Queued message by our producer are now consumed and printed to the console. The RabbitMQ Admin dashboard queue is cleared.

Get the complete code from Git.

Happy Messaging !!!

Configuring RabbitMQ on Ubuntu

RabbitMQ, in today’s microservice era, becomes one of the most popular message brokers. It is open-source and have API for popular programming languages. The current stable version is 3.13 and it was originally developed to support AMQP 0-9-1 messaging protocol.

A Brief Introduction to Message Broker:

Message queueing is a way of exchanging data between different applications. It is a system that is used to define queues that accepts messages from a publisher asynchronously. Assume a microservice application where many services are communicating with each other through APIs. In such cases, the services should not communicate in a crisscross manner, rather they should use a service bus like RabbitMQ.

Installing RabbitMQ:

In this article we’ll demonstrate how to configure RabbitMQ on Ubuntu. We are assuming that you have an available Ubuntu installation. We will use RabbitMQ Apt Repositories available on Cloudsmith. RabbitMQ has provided a Quick Start Script for straight forward installation which is available at: https://www.rabbitmq.com/docs/install-debian. Let’s create a separate directory for the script:

sult@sultubu:~$ cd /home/sult/
sult@sultubu:~$ mkdir rmq
sult@sultubu:~$ cd rmq
sult@sultubu:~$ vi rmq.sh

Now put the below script to this file. However, it is strongly recommended to have the latest script from the mentioned URL at above.

#!/bin/sh

sudo apt-get install curl gnupg apt-transport-https -y

## Team RabbitMQ's main signing key
curl -1sLf "https://keys.openpgp.org/vks/v1/by-fingerprint/0A9AF2115F4687BD29803A206B73A36E6026DFCA" | sudo gpg --dearmor | sudo tee /usr/share/keyrings/com.rabbitmq.team.gpg > /dev/null
## Community mirror of Cloudsmith: modern Erlang repository
curl -1sLf https://github.com/rabbitmq/signing-keys/releases/download/3.0/cloudsmith.rabbitmq-erlang.E495BB49CC4BBE5B.key | sudo gpg --dearmor | sudo tee /usr/share/keyrings/rabbitmq.E495BB49CC4BBE5B.gpg > /dev/null
## Community mirror of Cloudsmith: RabbitMQ repository
curl -1sLf https://github.com/rabbitmq/signing-keys/releases/download/3.0/cloudsmith.rabbitmq-server.9F4587F226208342.key | sudo gpg --dearmor | sudo tee /usr/share/keyrings/rabbitmq.9F4587F226208342.gpg > /dev/null

## Add apt repositories maintained by Team RabbitMQ
sudo tee /etc/apt/sources.list.d/rabbitmq.list <<EOF
## Provides modern Erlang/OTP releases
##
deb [signed-by=/usr/share/keyrings/rabbitmq.E495BB49CC4BBE5B.gpg] https://ppa1.novemberain.com/rabbitmq/rabbitmq-erlang/deb/ubuntu jammy main
deb-src [signed-by=/usr/share/keyrings/rabbitmq.E495BB49CC4BBE5B.gpg] https://ppa1.novemberain.com/rabbitmq/rabbitmq-erlang/deb/ubuntu jammy main

# another mirror for redundancy
deb [signed-by=/usr/share/keyrings/rabbitmq.E495BB49CC4BBE5B.gpg] https://ppa2.novemberain.com/rabbitmq/rabbitmq-erlang/deb/ubuntu jammy main
deb-src [signed-by=/usr/share/keyrings/rabbitmq.E495BB49CC4BBE5B.gpg] https://ppa2.novemberain.com/rabbitmq/rabbitmq-erlang/deb/ubuntu jammy main

## Provides RabbitMQ
##
deb [signed-by=/usr/share/keyrings/rabbitmq.9F4587F226208342.gpg] https://ppa1.novemberain.com/rabbitmq/rabbitmq-server/deb/ubuntu jammy main
deb-src [signed-by=/usr/share/keyrings/rabbitmq.9F4587F226208342.gpg] https://ppa1.novemberain.com/rabbitmq/rabbitmq-server/deb/ubuntu jammy main

# another mirror for redundancy
deb [signed-by=/usr/share/keyrings/rabbitmq.9F4587F226208342.gpg] https://ppa2.novemberain.com/rabbitmq/rabbitmq-server/deb/ubuntu jammy main
deb-src [signed-by=/usr/share/keyrings/rabbitmq.9F4587F226208342.gpg] https://ppa2.novemberain.com/rabbitmq/rabbitmq-server/deb/ubuntu jammy main
EOF

## Update package indices
sudo apt-get update -y

## Install Erlang packages
sudo apt-get install -y erlang-base \
                        erlang-asn1 erlang-crypto erlang-eldap erlang-ftp erlang-inets \
                        erlang-mnesia erlang-os-mon erlang-parsetools erlang-public-key \
                        erlang-runtime-tools erlang-snmp erlang-ssl \
                        erlang-syntax-tools erlang-tftp erlang-tools erlang-xmerl

## Install rabbitmq-server and its dependencies
sudo apt-get install rabbitmq-server -y --fix-missing

Make the file executable and run:

sult@sultubu:~$ chmod +x rmq.sh
sult@sultubu:~$ ./rmq.sh

Once done you can check that RabbitMQ service is installed at your server. It’ll run as a non-privelege user rabbitmq. To check the service status:

sult@sultubu:~$ systemctl status rabbitmq-server.service

You can start/ stop the service:

sult@sultubu:~$ systemctl stop rabbitmq-server.service

sult@sultubu:~$ systemctl start rabbitmq-server.service

On the next step, we will enable management plugin for web management console.

sult@sultubu:~$ sudo rabbitmq-plugins enable rabbitmq_management

You can check the list of enabled plugin:

sult@sultubu:~$ sudo rabbitmq-plugins list

It’ll enable the web management with default user & password guest & guest respectively at port 15672.

This can be browsed from the localhost only http://localhost:15672 because guest user by default can’t access from outside. Now we’ll create an admin user with password admin123.

sult@sultubu:~$ sudo rabbitmqctl add_user admin admin123

Next this user needs to give the Administrator role:

sult@sultubu:~$ sudo rabbitmqctl set_user_tags admin administrator

The final thing on successful user creation is to allow the user for all virtual host:

sult@sultubu:~$ sudo rabbitmqctl set_permissions -p "/" "admin" ".*" ".*" ".*"

Now you can login using this user from the network. However, the mentioned port must be allowed at Ubuntu firewall. For the ease of configuration we are just disabling the firewall for the time being:

sult@sultubu:~$ sudo ufw disable

Now let us login from the network http://<rabitmq-server-ip&gt;:15672

We can check the user list that we’ve just created. Click on “Admin” tab:

Exchange & Queue:

As discussed at the beginning, RabbitMQ works as publisher-subscriber or producer-consumer model. The terms are used interchangeably.

  1. A publisher/producer publishes message to exchange with binding key and queue name.
  2. Exchange route the message to designated queue.
  3. A subscriber/consumer subscribe to that Queue will receive the message and send acknowledgement.

The bounding between exchange and queue are done by routing key. There are different type of exchanges like direct, headers, topic and fanout. For detail discussion of the exchanges kindly refer to the RabbitMQ tutorial https://www.rabbitmq.com/tutorials.

You can browse the list of exchanges from the web console:

Except “MyRMQEx”, the other exchanges are created by default during installation. Our exchange “MyRMQEx” is a direct exchange and it is bound to a queue “MyRMQQu”.

Simply, a Queue is bound to an Exchange using the Routing Key. We’ve kept the Routing Key empty so the exchange is directly bound to the Queue. You can see the Queue list from Admin panel:

For more detail on Exchange & Queue creation, binding and messaging please refer to my article https://sultanealam.com/2024/03/11/implement-rabbitmq-with-net-core.

Finally, we want to enable the message tracing and logging so that we can check the message comes and leave to this Queue. RabbitMQ has a “Firehose” tracer that enables the message tracing https://www.rabbitmq.com/docs/firehose.

However, we’ll use the GUI plugin https://www.rabbitmq.com/blog/2011/09/09/rabbitmq-tracing-a-ui-for-the-firehose for this. We need to enable the plugin:

sult@sultubu:~$ sudo rabbitmq-plugins enable rabbitmq_tracing

Once tracing is enabled you can find it under admin tab.

Now, let’s create a trace for the Queue “MyRMQQu”:

Let’s use the queue name as trace name, you can use any other name as well. I’ve kept the same credential that I’ve used for web console for the tracer connection. The pattern is used “#” to trace all incoming and outgoing message. Click Add Trace to complete and you will find the tracer is added.

The Trace of file size will grow once message are published and subscribed. We can click on the Trace log file name to view the log entry:

Moreover, the trace log can be found from shell as well. You need to be the root used to view the log:

sult@sultubu:~$ su -
Password:
root@sultubu:~# cd /var/tmp/rabbitmq-tracing/
root@sultubu:/var/tmp/rabbitmq-tracing# ll
total 24
drwxr-x--- 2 rabbitmq rabbitmq 4096 মার্চ 6 18:02 ./
drwxrwxrwt 12 root root 4096 মার্চ 7 04:36 ../
-rw-r----- 1 rabbitmq rabbitmq 14000 মার্চ 6 18:32 MyRMQQu.log

The MyRMQQu.log is our trace file. We can tail the log from here:

root@sultubu:/var/tmp/rabbitmq-tracing# tail -f MyRMQQu.log
Connection:   172.28.208.1:14010 -> 172.28.216.186:5672
Virtual host: /
User:         admin
Channel:      1
Exchange:     MyRMQEx
Routing keys: [<<>>]
Queue:        MyRMQQu
Properties:   []
Payload:
{"TransactionId":15,"TransactionAmount":15000.0,"TransactionDate":"2024-03-06T18:03:03.1589113+06:00"}

The default RabbitMQ log is available at /var/log/rabbitmq/.

That’s all about the installation of RabbitMQ on Ubuntu. Please see my other article to know how we can implement a Producer and consumer using .Net Core: https://sultanealam.com/2024/03/11/implement-rabbitmq-with-net-core/

Happy Messaging !!!

Microservice Architecture

Microservice Architecture is one of the new buzzes in the software architecture arena. There are a lot of questions, confusions and contradictions about this pattern. Here I am trying to summarize the entire concept which might seems a bit over simplification. But yet it can be a very good starting point of understanding the basic concepts.

The Traditional Architecture (The Monolith)

Let us start with the way we’ve been developing our software. Considering a simple e-commerce store front application where it is able to take orders from customers, verifies inventory, available credit and ships item.

We might assume the following:

  • It has both mobile and web interface
  • It has the API to expose the services to some third party applications
  • It has the ability to handle http requests and therefore deployed in a web server like IIS or Apache
  • It has the ability to executing business logic
  • It has access to relational database like MS SQL or Oracle
  • And many more

Therefore, the application might have the following architecture:

  • A Store Front UI (Mobile/ Web/ Desktop)
  • Accounting Service
  • Inventory Service
  • Shipping Service
  • Business Layer
  • Data Access Layer
  • And whatever you think feasible

Fig: A Traditional Monolithic Architecture

This application would be a simple monolithic one which can be deployed at IIS or Apache web server or whatsoever you prefer for. A hardware or software load balancer can be incorporated to scaling up and improve availability as well.

Now consider the advantages that we have with this architecture:

  • Simple and quick development cycle
  • Easy to deploy
  • Easy to scale

However, once the application becoming to grow, more and more modules are adding on it will be:

  • Difficult to maintain the large code base
  • Take more time to introduce new developers
  • Bulky IDE
  • Difficult to patching update
  • Continuous deployment require rigorous testing
  • Stuck to the technology

The Microservice

Now let us think it on a different way. Instead of having everything all together (like the way we’ve described above) it might be designed in other approach where:

  • It is designed as a set of loosely coupled, collaborating services
  • Each of the services consist of its own business logic and database
  • The services can run independently or/ and interdependently with other third party services

Fig: Microservice Architecture

The benefits this architecture will provide:

  • Easier for a developer to get in
  • More responsive IDE
  • Easier to deploy new version of any service
  • Easier to scaling development between different teams
  • Eliminate the technology stuck
  • Improved fault isolation

Anyway, nothing comes without disadvantages and the drawbacks are:

  • Developers have to deal with the additional complexity of distributed system
  • Deployment is still an issue due to the complex nature of managing different service types
  • Requires more effort on integration testing

Characteristics of Microservice

So far we’ve a basic understandings of both the architectures. Let us try to define Microservice. From James Lewis and martin Fowler:

“In short, the Microservice architectural style is an approach to developing a single application as a suite of small services, each running in its own process and communicating with lightweight mechanisms, often an HTTP resource API. These services are built around business capabilities and independently deployable by fully automated deployment machinery. There is a bare minimum of centralized management of these services, which may be written in different programming languages and use different data storage technologies.”

Well enough? Hard to get the definition? Let us put things in a simpler way. Instead of having a formal definition let us try to define the characteristics of Microservice:

  • Componentization via Services – The service must be independently upgradeable and replaceable.
  • Organized around Business Capabilities – The team must be sufficiently capable of delivering the end user business needs themselves, no segregation of team considering like UI developer, DBA and so on.
  • Products not Projects – A team developing the product will own the product for its full lifetime, no project ownership but product.
  • Smart endpoints and dumb pipes – No enterprise service bus (ESB), the endpoint should be intelligent to handle end to end requirements.
  • Decentralized Governance – Managing of services along with the underlying technology are not standardized centrally. Each service development team have their own choices to go with the exact need for that service.
  • Decentralized Data Management – No central database for all the services. Each service talks to their own database.
  • Infrastructure Automation – Unlike monolith automation of infrastructure is an utmost requirement for continuous delivery and integration.
  • Design for failure – Need to be designed so that any service failure can respond to other as graceful as possible.
  • Evolutionary Design – Enable application developer to control changes in their services without slowing down handling change requirement.

Monolith vs Microservice

Now let us try to differentiate both the architecture in the easiest form. The big advantage of Monolith is, it is simple and relatively easy to use. We are used to with this architecture for so long and it is proven to work for. However, when the question of continuous deployment comes in, Microservice is easy to deploy. If we want to upgrade a monolith we’ve to upgrade the entire thing. Whereas, Microservice can do the upgrade only for the components that is require to upgrade. This becomes crucial when continuous upgradation is a part of development, upgrades are happening not once in a month but almost every week and even every day.

Another great advantage of Microservice is availability. If one of our services goes down, still we can run the other services. However, the tradeoff here is the consistency. It is always harder to maintain consistency for Microservice compare to Monolith. There is a lot of components communicating each other through network layers and one mess can mess the whole.

In monolith it is easier to refactor between modules. But yes we’ve to understand the module boundary perfectly to do so. But still if we’ve some issue we can easily do the refactor. But for Microservice doing inter module refactoring means a lot. It’s not only copying the class and objects from here to there but it means to change at the different service layer. However, it turns to the point that Microservice ensures to preserve modularity because we are bound to do so. It is kind of a discipline that forces us to keep the modularity.

Last but not least, Microservice helps to go for multiple platform. We can have one module written on C# and the other in Java or whatsoever is suitable for. Which is almost not easily practicable in Monolith.

Microservice and SOA

The major question on this arena is that are Microservice just SOA? Before answering this let us try to revisit what SOA means? From Don Box:

“There are four tenets of service-orientation

  • Boundaries are explicit
  • Services are autonomous
  • Services share schema and contract, not class
  • Service compatibility is based on policy”

For Microservice the first two tenets are satisfied with the real emphasis on the second. In fact, we can consider Service Oriented Architecture (SOA) is something like our enterprise service bus which is a very broad terminology and Microservice is just a subset of SOA.

Wrapping Up

So, that’s all! A bit over simplification of Microservice Architecture but I think it can be a very good starting point. If we compare with Monolith it is all about the tradeoff we want to make. We just cannot come in a conclusion that the Monolith era is over, rather we should say that Microservice comes with the answer of few burning questions of Monolith. However, you should go for Microservice if you really need it. It is not a fancy type of thing that you explore at your production without proper planning.

Resources

Happy Micro servicing  🙂